You are a Clustaar user ? Congratulations, you can now integrate all GetQuanty data in your Clustaar chatbot with this simple integration. Main perks :
- Trigger your Clustaar chatbot based on GetQuanty information : client/prospect, scoring, activity, workforce… And more !
- Build precise scenarios based on B2B or behavioral data : helpdesk for clients, alert your sales team when a prospect is visiting.
- Build custom dashboards to manage effectively your chatbot and detect more opportunities.
Not using Clustaar yet ? Visit their website here to book a demo : https://clustaar.com
Important : you need a Clustaar account, the Live API option in GetQuanty and Google Tag Manager to connect these apps.
1. Tracking scripts
1.1 GetQuanty tracking script
Your GetQuanty script (available in your GetQuanty interface, in the « Parameters » menu, then « Website Script ») has to be already published with Google Tag Manager on your website. If not, please check this tutorial : https://getquanty.zendesk.com/hc/fr/articles/360016082693-Installer-le-script-GetQuanty-via-Google-Tag-Manager-GTM-
1.2 Clustaar tracking script
Your Clustaar tracking script has to be already published with Google Tag Manager on your website. If not, please contact the Clustaar support at https://help.clustaar.com/en/
2. Deploy the Push Tag with Google Tag Manager
The following Push Tag purpose is to push GetQuanty data from the GTM data layer to Clustaar.
<script>

console.log("waiting for clustaar");

  var clustaarloaded;

  var wc;

var citerations=0;


var cpushvalues= setInterval(function(){


  window.ClustaarWebchat.sendCustomEvent('Getquanty');


if (clustaarloaded) {


  wc=window.ClustaarWebchat;


clearInterval(cpushvalues);

console.log("sending to clustaar");

console.log(gq_data);


try{


 wc.sendCustomEvent('Getquanty');


  wc.pushAttribute('provider', 'GetQuanty');

  console.log("pushing to clustaar");

  console.log(gq_data);


  if (gq_data && gq_data.gq_company) {


    console.log("updating user");

             wc.pushAttribute('nleads','no');

    if (gq_data.gq_email) wc.pushAttribute('email',gq_data.gq_email);

             if (gq_data.gq_company) wc.pushAttribute('company',gq_data.gq_company);

             if (gq_data.gq_segment) wc.pushAttribute('segment',gq_data.gq_segment);

             if (gq_data.gq_scoring) wc.pushAttribute('scoring',gq_data.gq_scoring);

             if (gq_data.gq_keywords) window.ClustaarWebchat.pushAttribute('keywords',gq_data.gq_keywords);

             if (gq_data.gq_size) wc.pushAttribute('size',gq_data.gq_size);

             if (gq_data.gq_naflabel) wc.pushAttribute('activity',q_data.gq_naflabel);

             if (gq_data.gq_nafcode) wc.pushAttribute('nafcode',gq_data.gq_nafcode);

 if (gq_data.gq_city) wc.pushAttribute('city',gq_data.gq_city);

 if (gq_data.gq_zipcode) wc.pushAttribute('zipcode',gq_data.gq_zipcode);

 if (gq_data.gq_country) wc.pushAttribute('country',gq_data.gq_country);


  }

} catch(e){console.log(e);} }

else {

            citerations++;

                                               if (citerations<10) {

                                               console.log("clustaar not ready yet");

                                               }

                                               else

                                               {

                                               console.log("aborting clustaar after 10 attempts");

                                               clearInterval(cpushvalues);

                                               }

        }

            },3000);

</script>
2.1 Copy the Push Tag
2.2 Log in to Google Tag Manager : https://tagmanager.google.com/
2.3 Go to the « Tags » section, select « New » and click on « Tag Configuration »
2.4 Chose « Custom HTML » and paste your Push Tag
2.5 Click on the « Triggering » block and select the « Scoring_Done » custom event
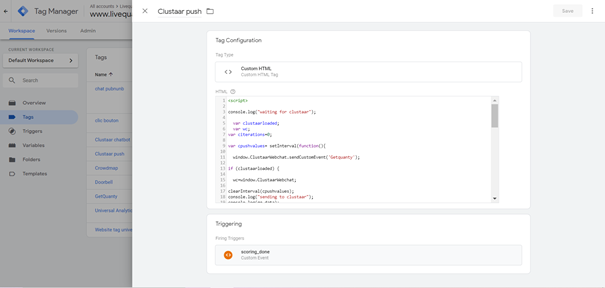
2.6 Name your tag and save it
2.7 Click on the « Submit » button to deploy your tag !
3. Setup your chatbot in Clustaar
The last step is to declare the right variables in Clustaar for it to catch relevant data.
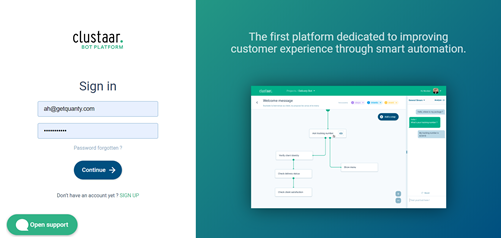
3.1 First, log in to Clustaar here : https://app.clustaar.com/
3.2 Go to « Settings » on the right menu then « API » on the top menu and find the « User Attributes Whitelist » section

3.3 Then, you simply have to declare the following variables :
- nleads
- company
- segment
- scoring
- keywords
- size
- activity
- nafcode
- city
- zipcode
- country
NB : for advanced users, you can edit the label and order of these variables directly in the Push Tag. Don’t forget to report these modifications in your Clustaar’s User Attributes Whitelist !
3.4 Save and admire your work !
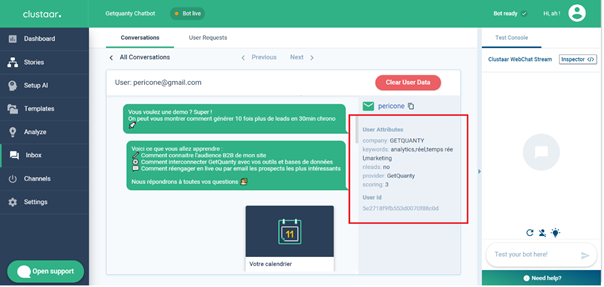
You can see your GetQuanty User Attributes directly in your Inbox section. You can also build new scenarios (« Stories » in Clustaar) based on your B2B data !
Une question sur l'utilisation de GetQuanty ?
support@getquanty.com