This procedure is adapted for those who have already set up GTM in order to manage all the Javascript codes placed on their pages. Indeed, GTM is a code manager that is presented as a "container" in which you can place several tags.
Google Tag Manager is an excellent complement to your cookie manager in order to correctly set up the GetQuanty script with the consent of your visitors. Indeed, the latter offer on their platform personalized triggers.
1. Get your site ID in GetQuanty
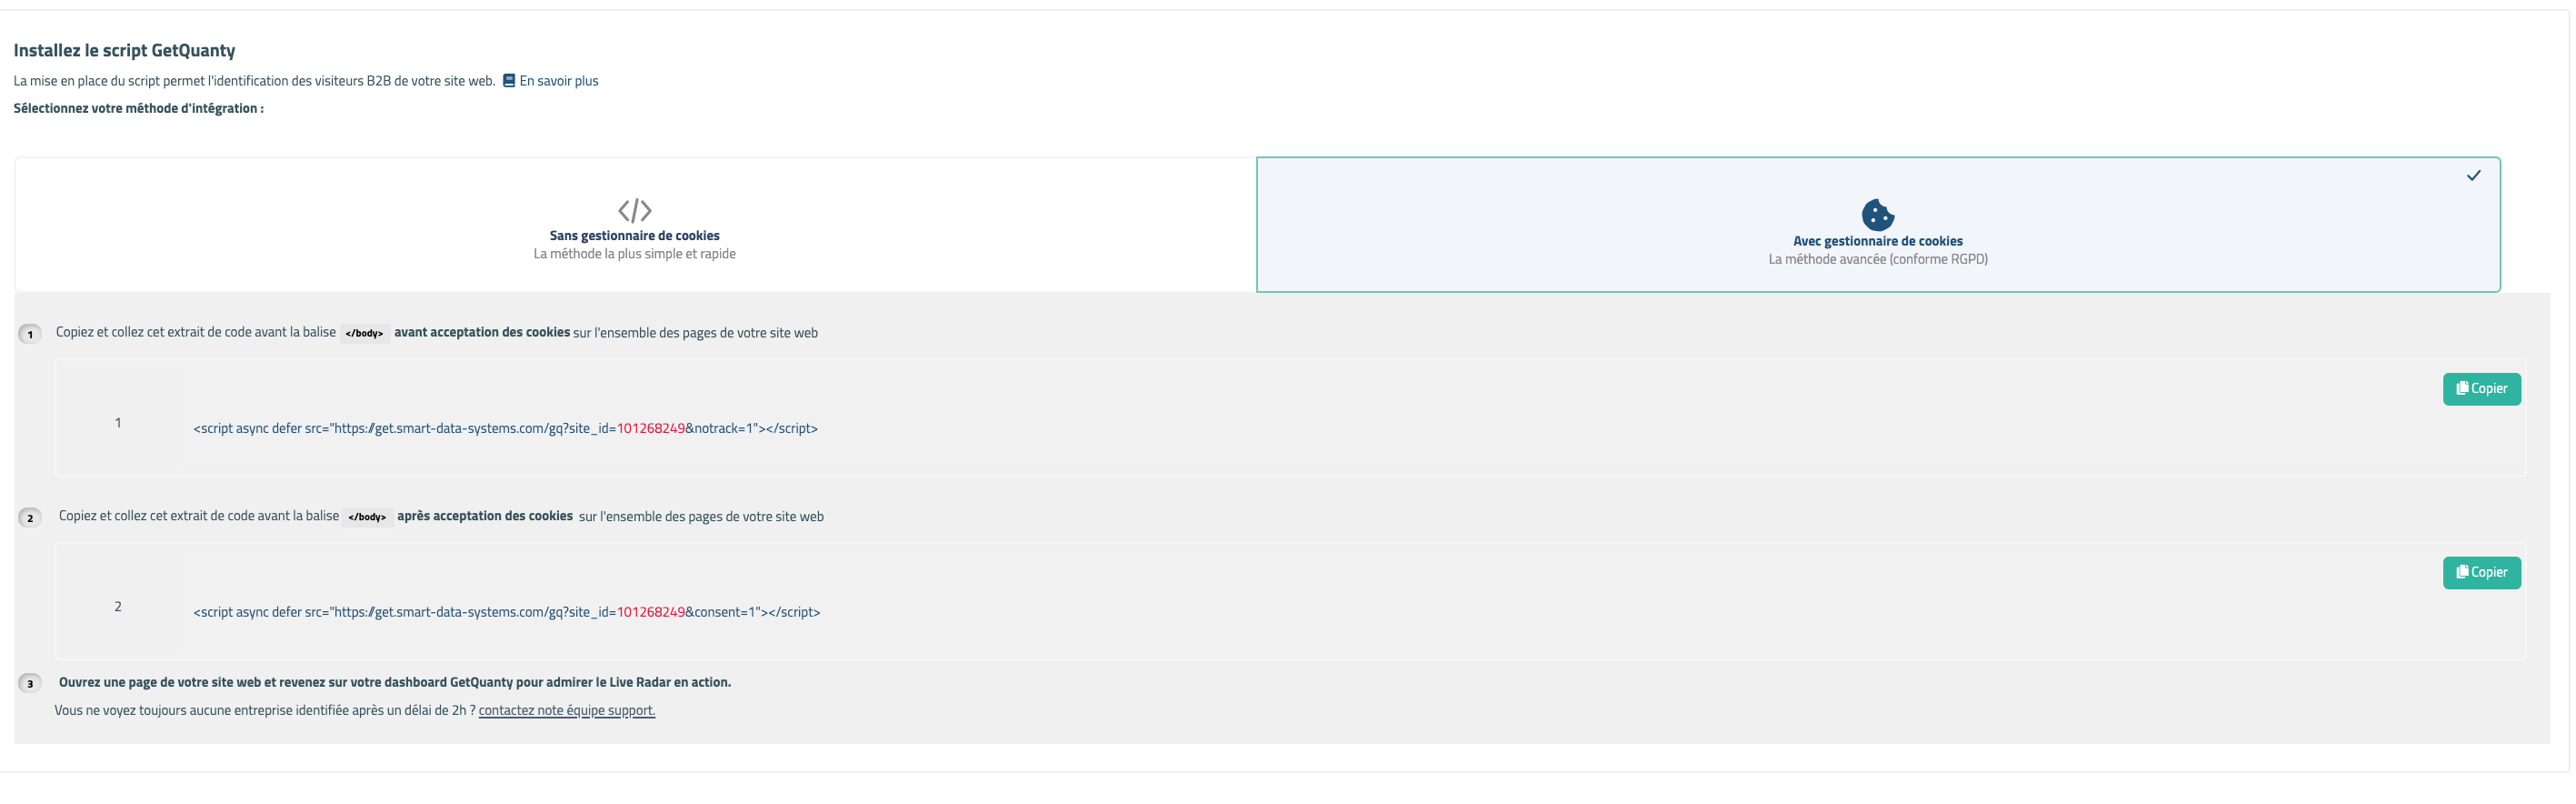
Before starting this tutorial, make sure you have both versions of the GetQuanty script: notrack=1 and consent=1. If this is not the case, please contact your CSM or support@getquanty.com.
Click on "Settings" in the left side menu, then on the sub-tab "Website script", you will find your scripts as the following shot :
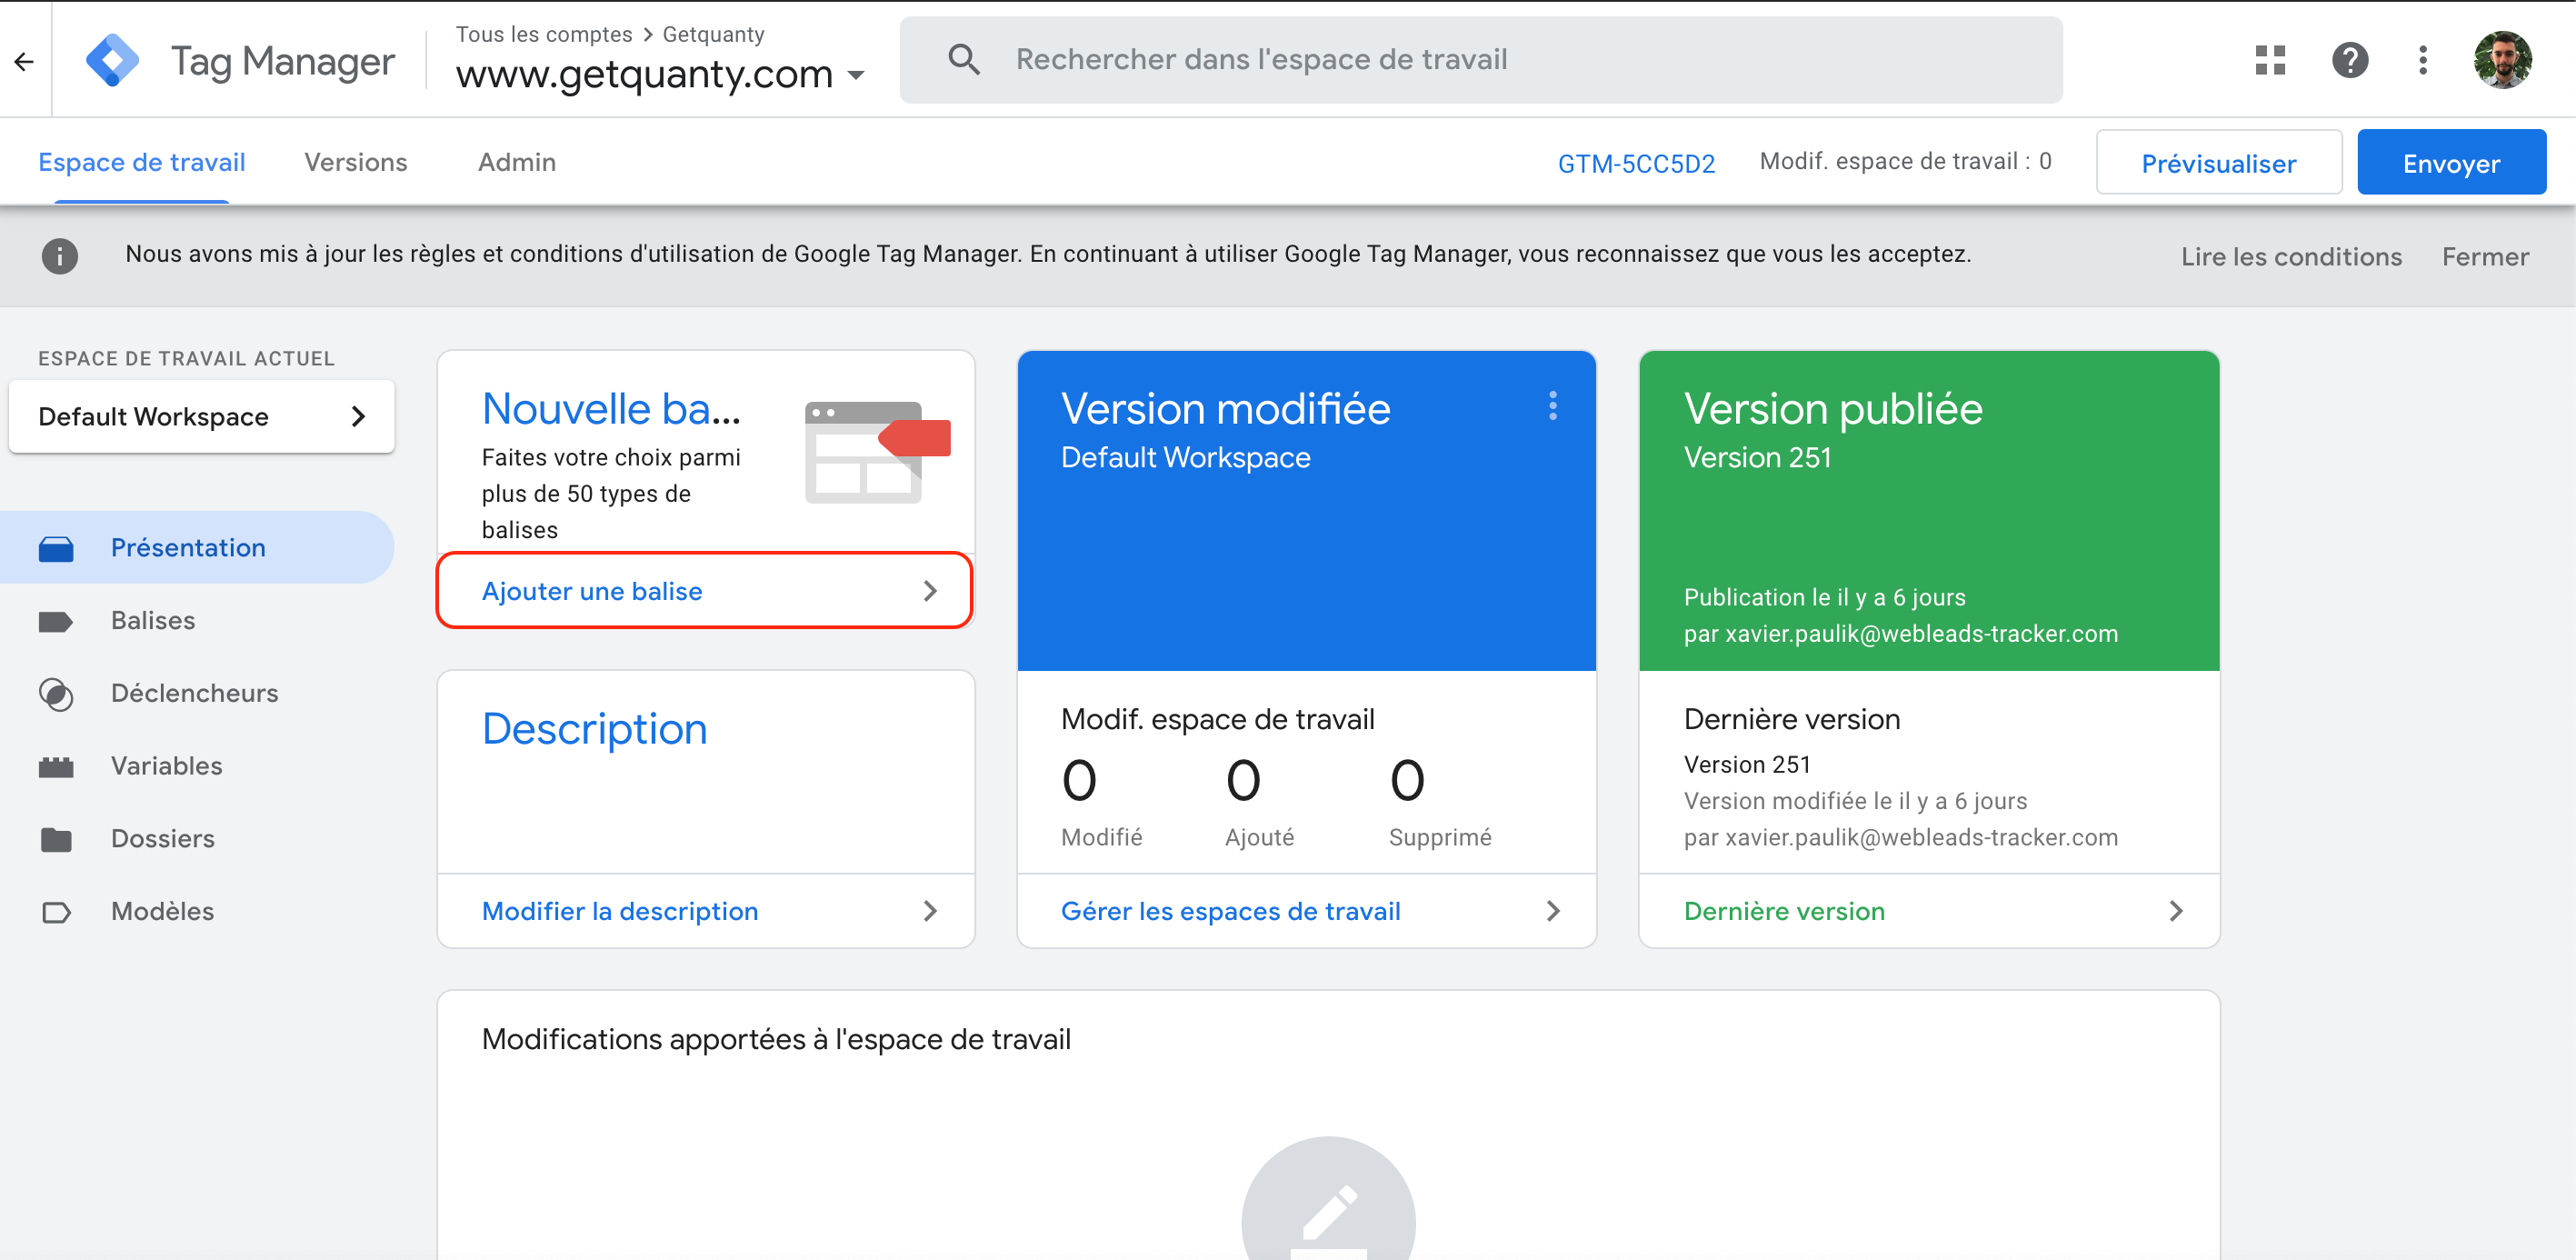
2. In your Google Tag Manager Admin panel
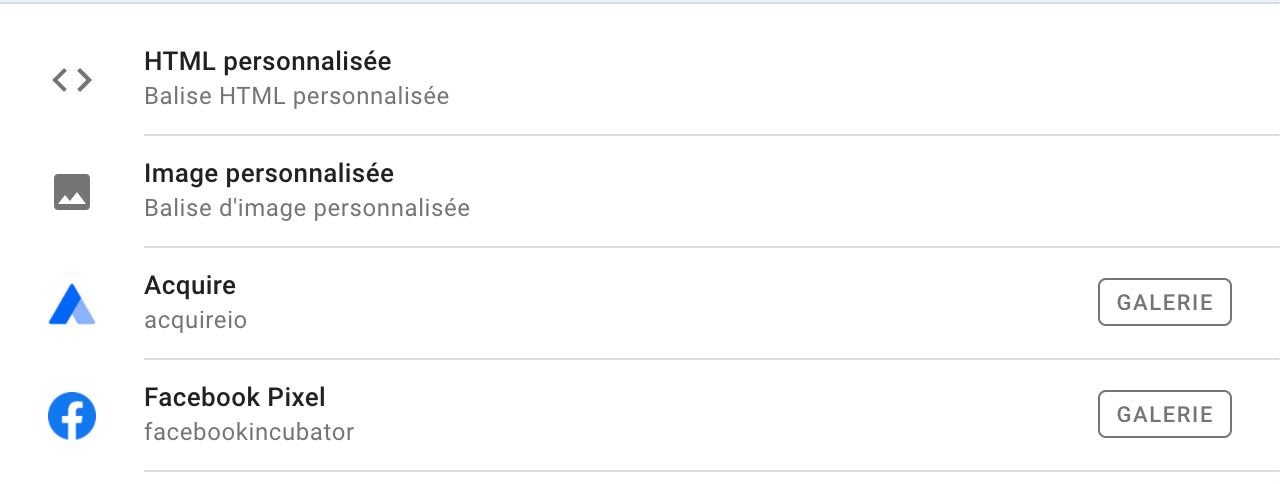
Once on your GTM panel, click on "Add a tag".
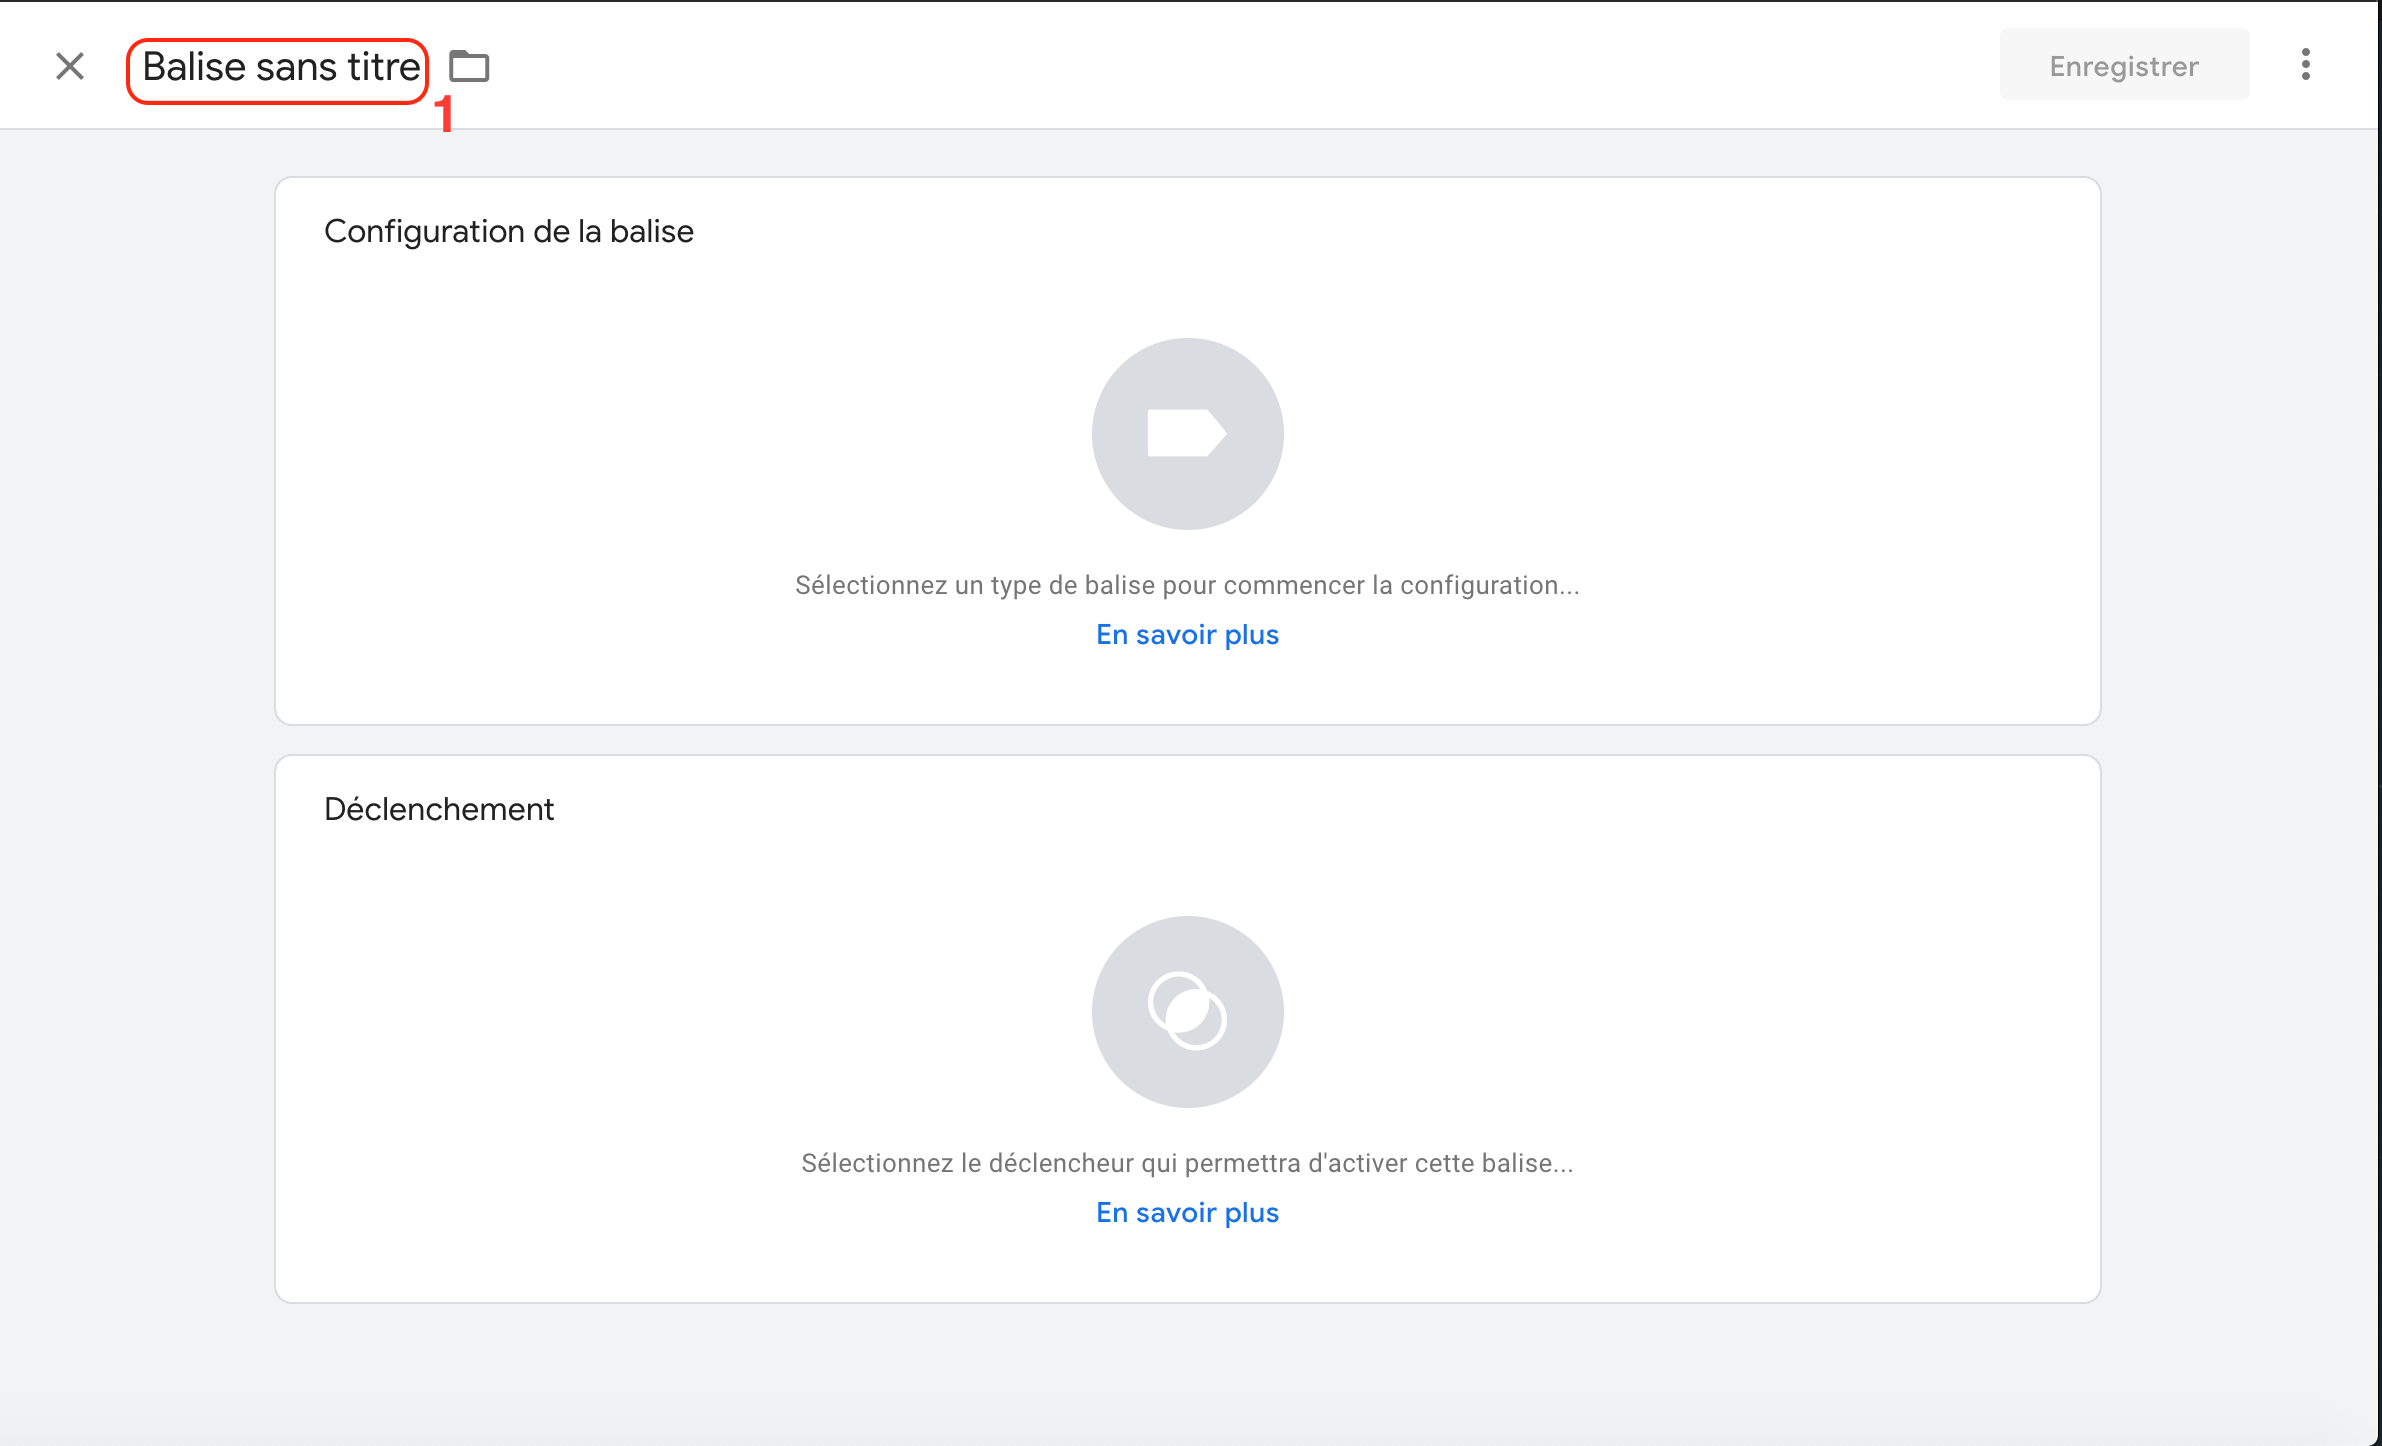
3. Creation of the GetQuanty tag without consent
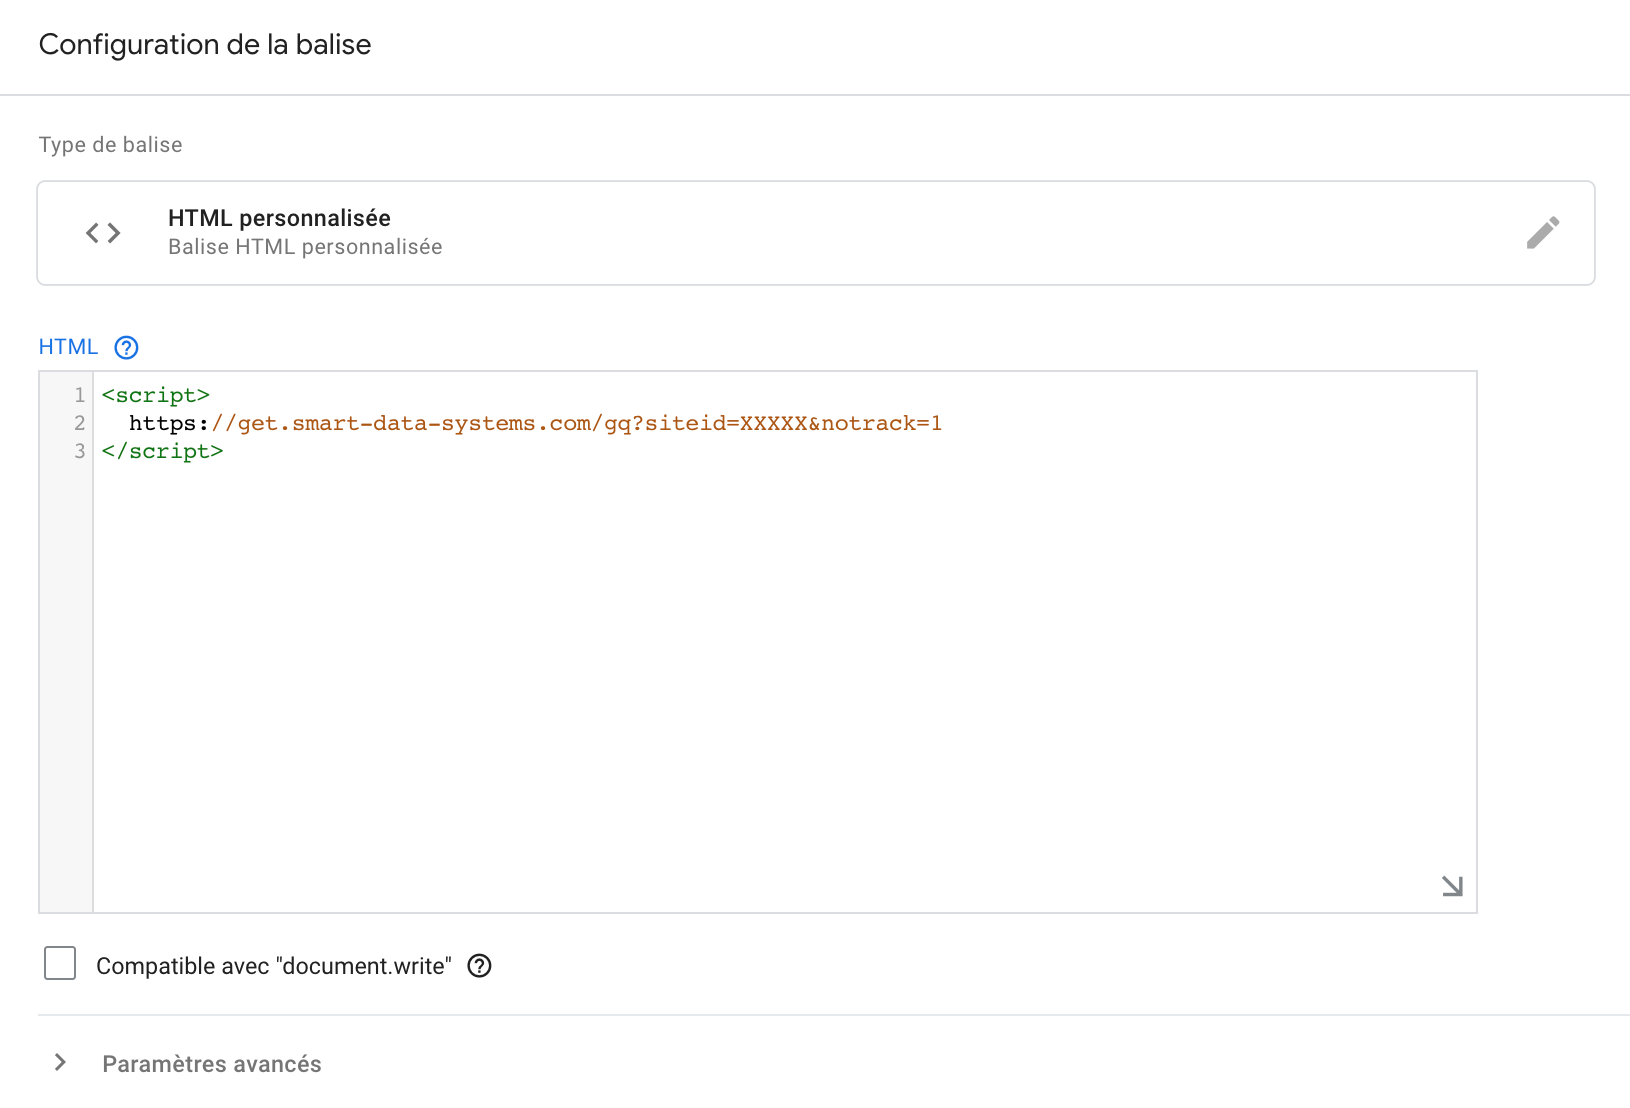
You can give a name to your tag in order to better find it (1), then click on the "Tag Configuration" menu icon.
Now choose the "Custom HTML" option.
Here, you will need to paste the first script in the form:
<script>https://get.smart-data-systems.com/gq?siteid=XXXXX¬rack=1</script>
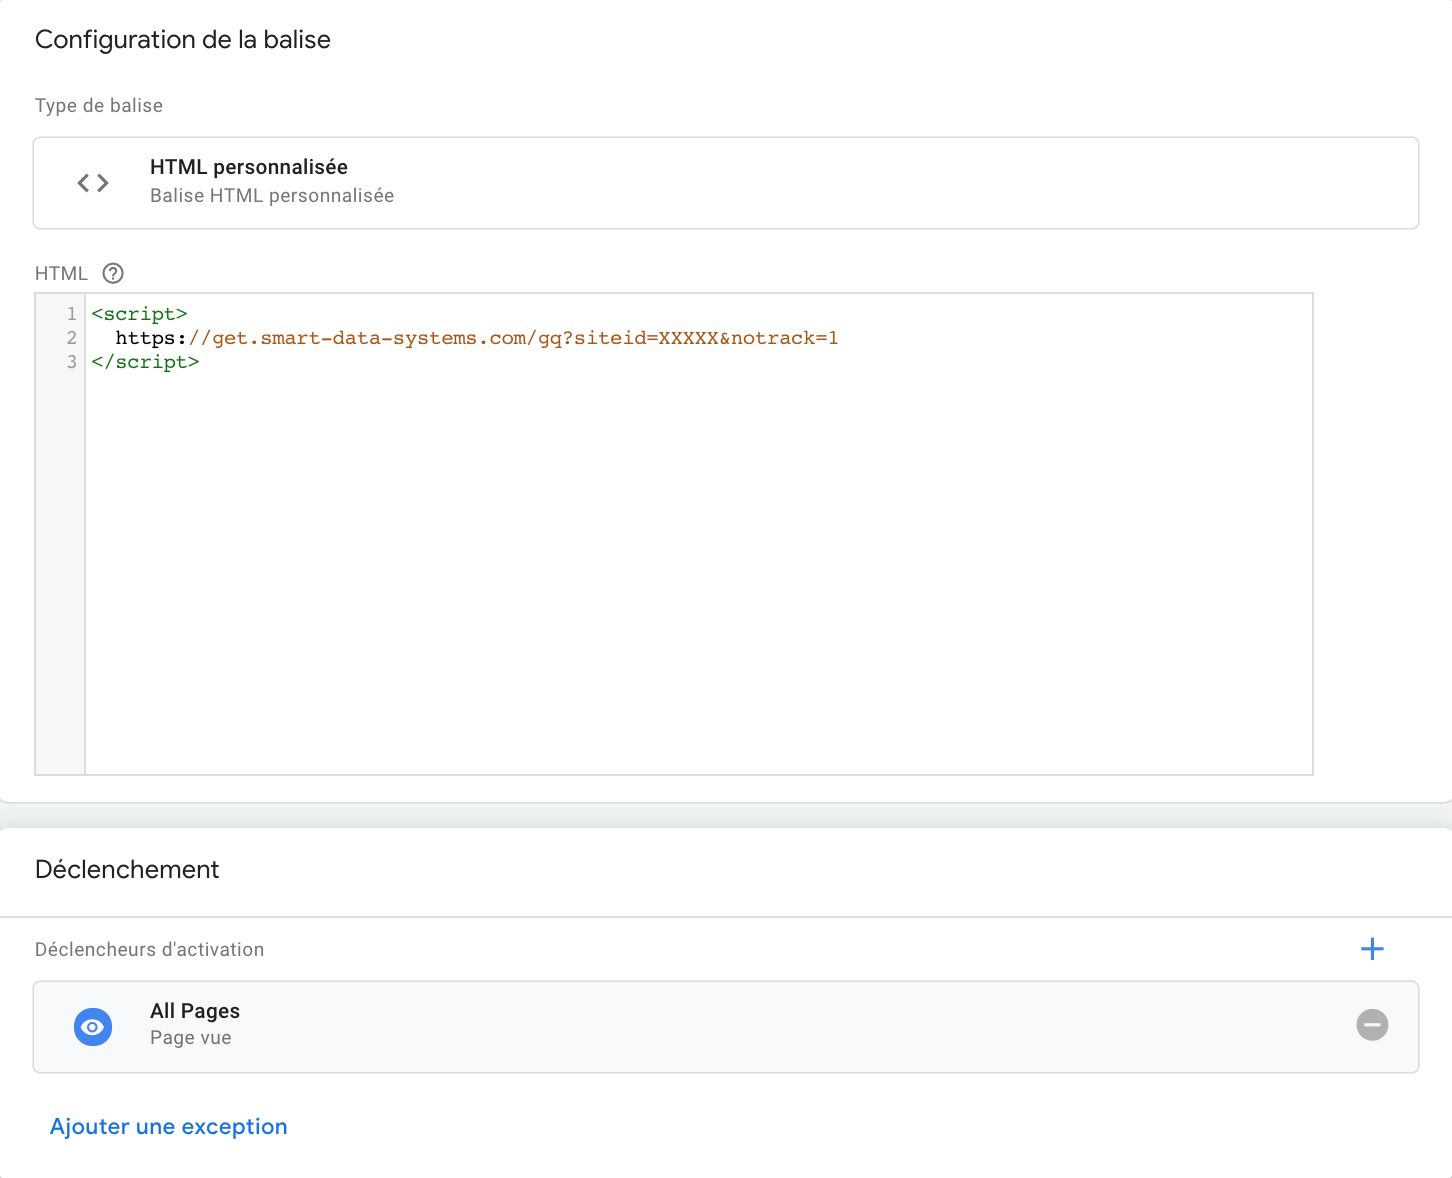
Then go to the "Trigger" section just below and choose the "All pages" trigger.

So you should arrive at this result:
Let's remember here that the GetQuanty script doesn't need consent from the visitor to work, since the basis of GetQuanty's identification is through the IP address. The second part we will look at here is the marketing use related to your audience's visit, which does require consent to operate.
4. Creating your GetQuanty consent tag
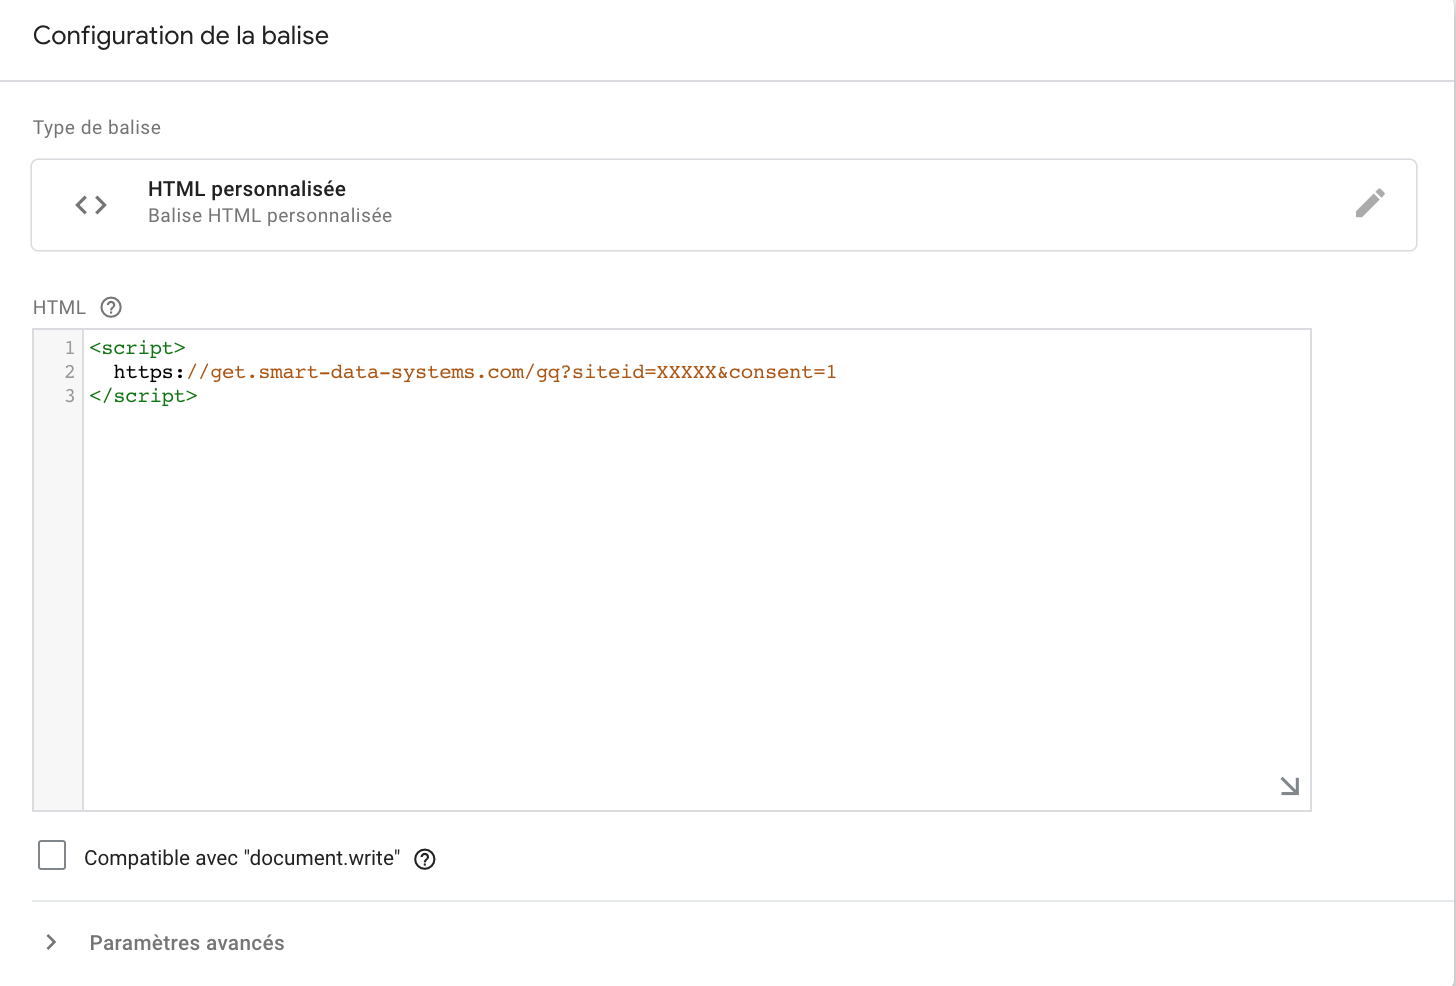
Here we will need the second version of the script in the form:
<script>https://get.smart-data-systems.com/gq?siteid=XXXXX&consent=1</script>
So go back to the previous step and this time integrate this script:
As with the previous step, go here to the "Trigger" section and click on the top right to create a new trigger.

Now choose the "Custom event" trigger.
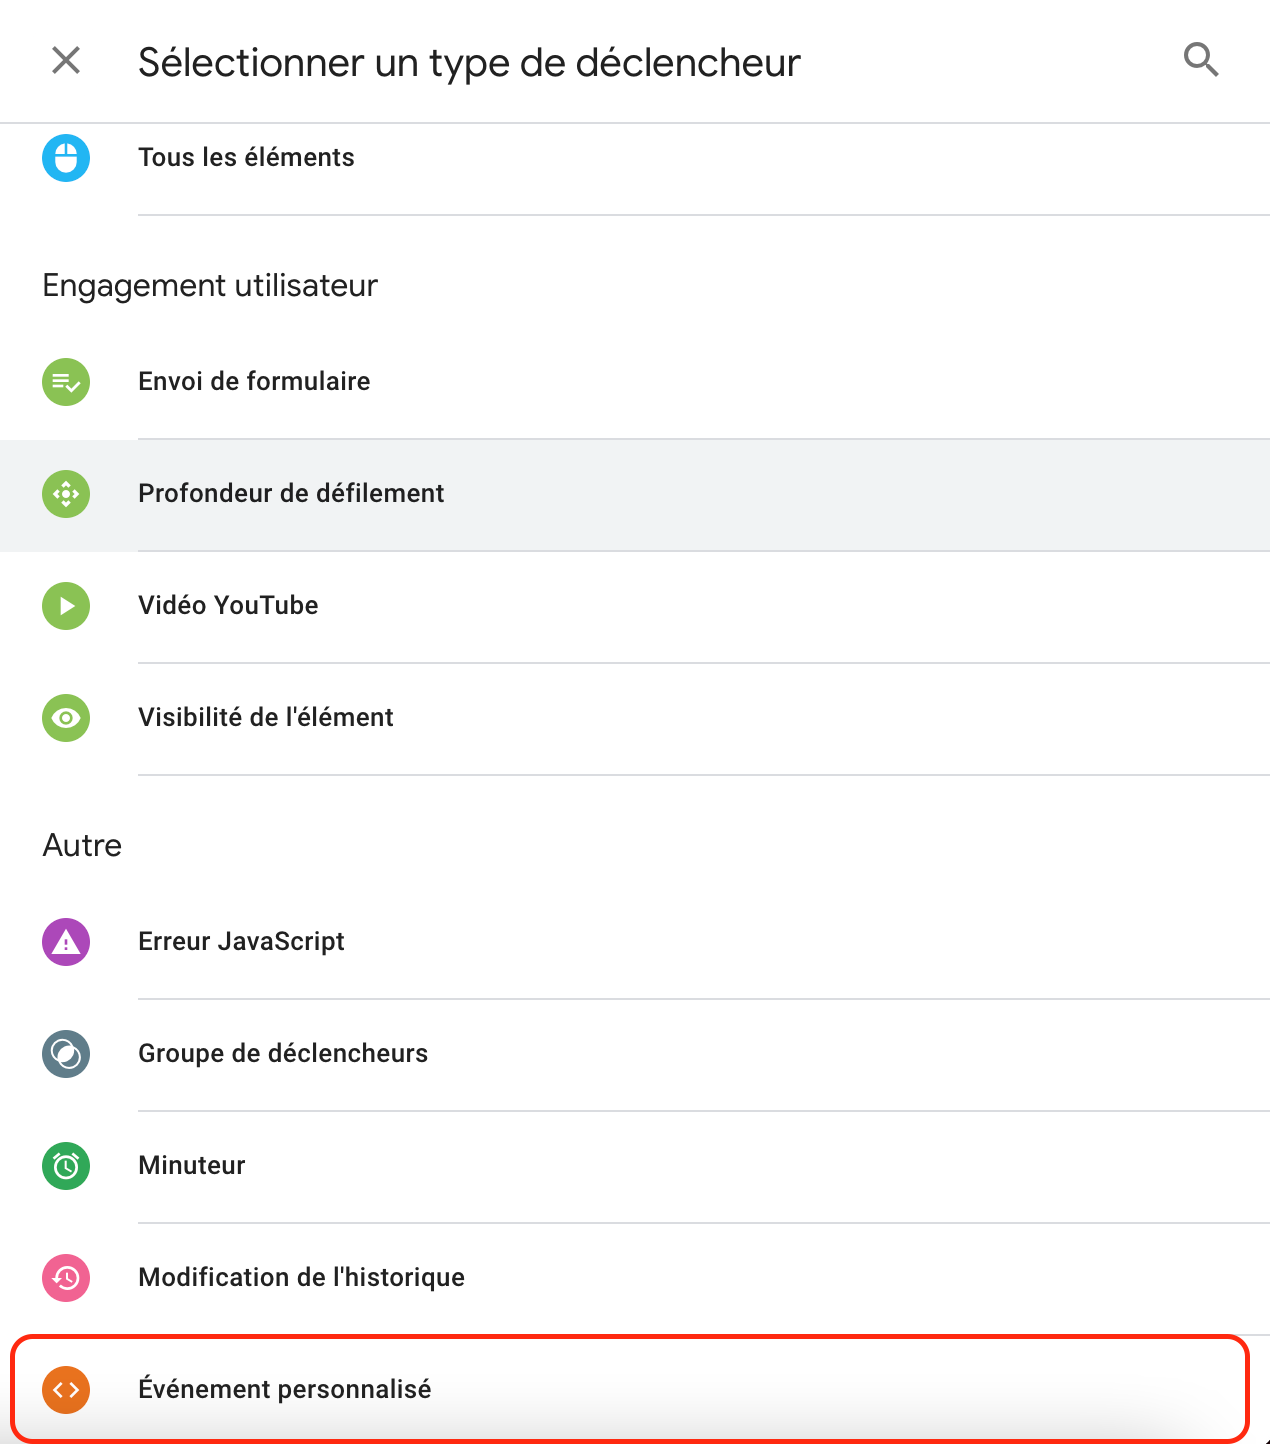
When you arrive on this page, you will have access to the name of the event. If you have used a cookie manager like Axeptio, this is where you will have to fill in the custom trigger of your manager.

If you don't use a cookie manager, you can leave the trigger blank and stop at the installation step of your second script. If you do not have a cookie solution on your site at this time, we strongly advise you to install one if you want to take full advantage of the capabilities of your site and GetQuanty.
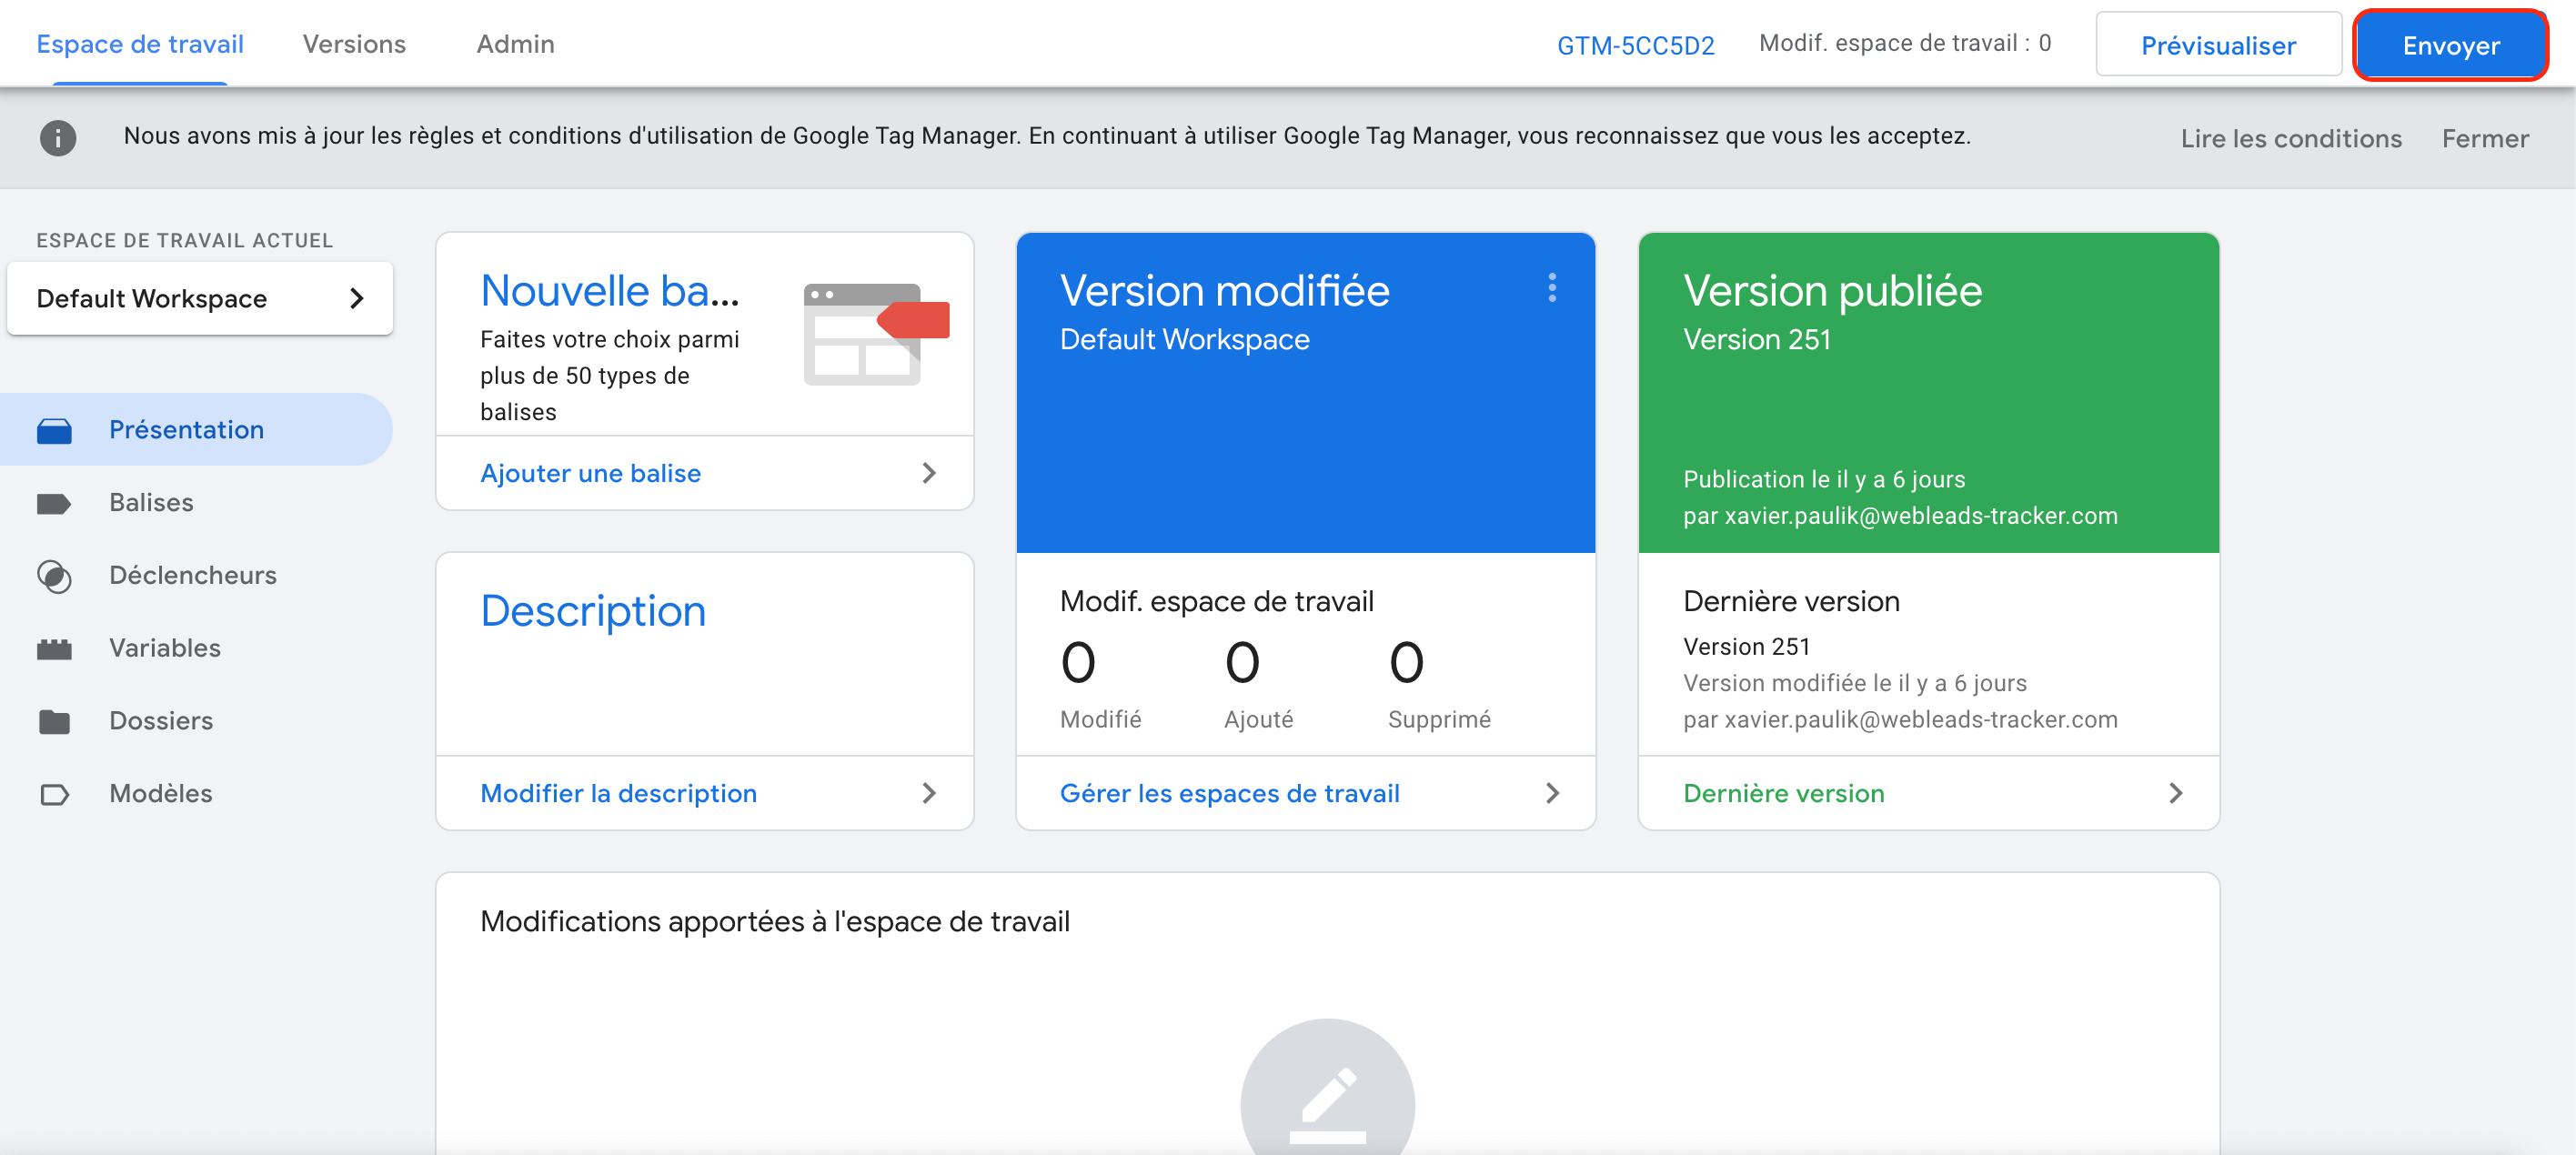
6. Publish your tag
We are almost there: Save your tags and you can now publish them by clicking on the "Send" button in the upper right corner.
Une question ? Un conseil ?
support@getquanty.com